6. 🪄 Use the Model Warper#
Warning
Model warping is very 🪄 experimental 🪄.
We invite you to try model warping out and get a feel for how it might be useful. Maybe it’s already useful enough for you to use it in something serious (some researchers already have 🎉).
However, be aware that some implementation details of model warping, such
as the structure of the .warpconfig.toml file, aren’t stable yet. This
means that they may change as model warping is developed.
The documentation here is extremely work-in-progress, so expect many TODO s
and FIXME s. This will be improved as the model warping feature is developed.
We figured it’s better to show you what’s available as we develop it, rather
than only releasing once it’s perfect.
In this tutorial, we will be using the model warping UI to warp an entire OpenSim model in a landmark-driven way. The benefit of this technique, compared to standard scaling, is that it makes non-uniform, subject-specific scaling possible.

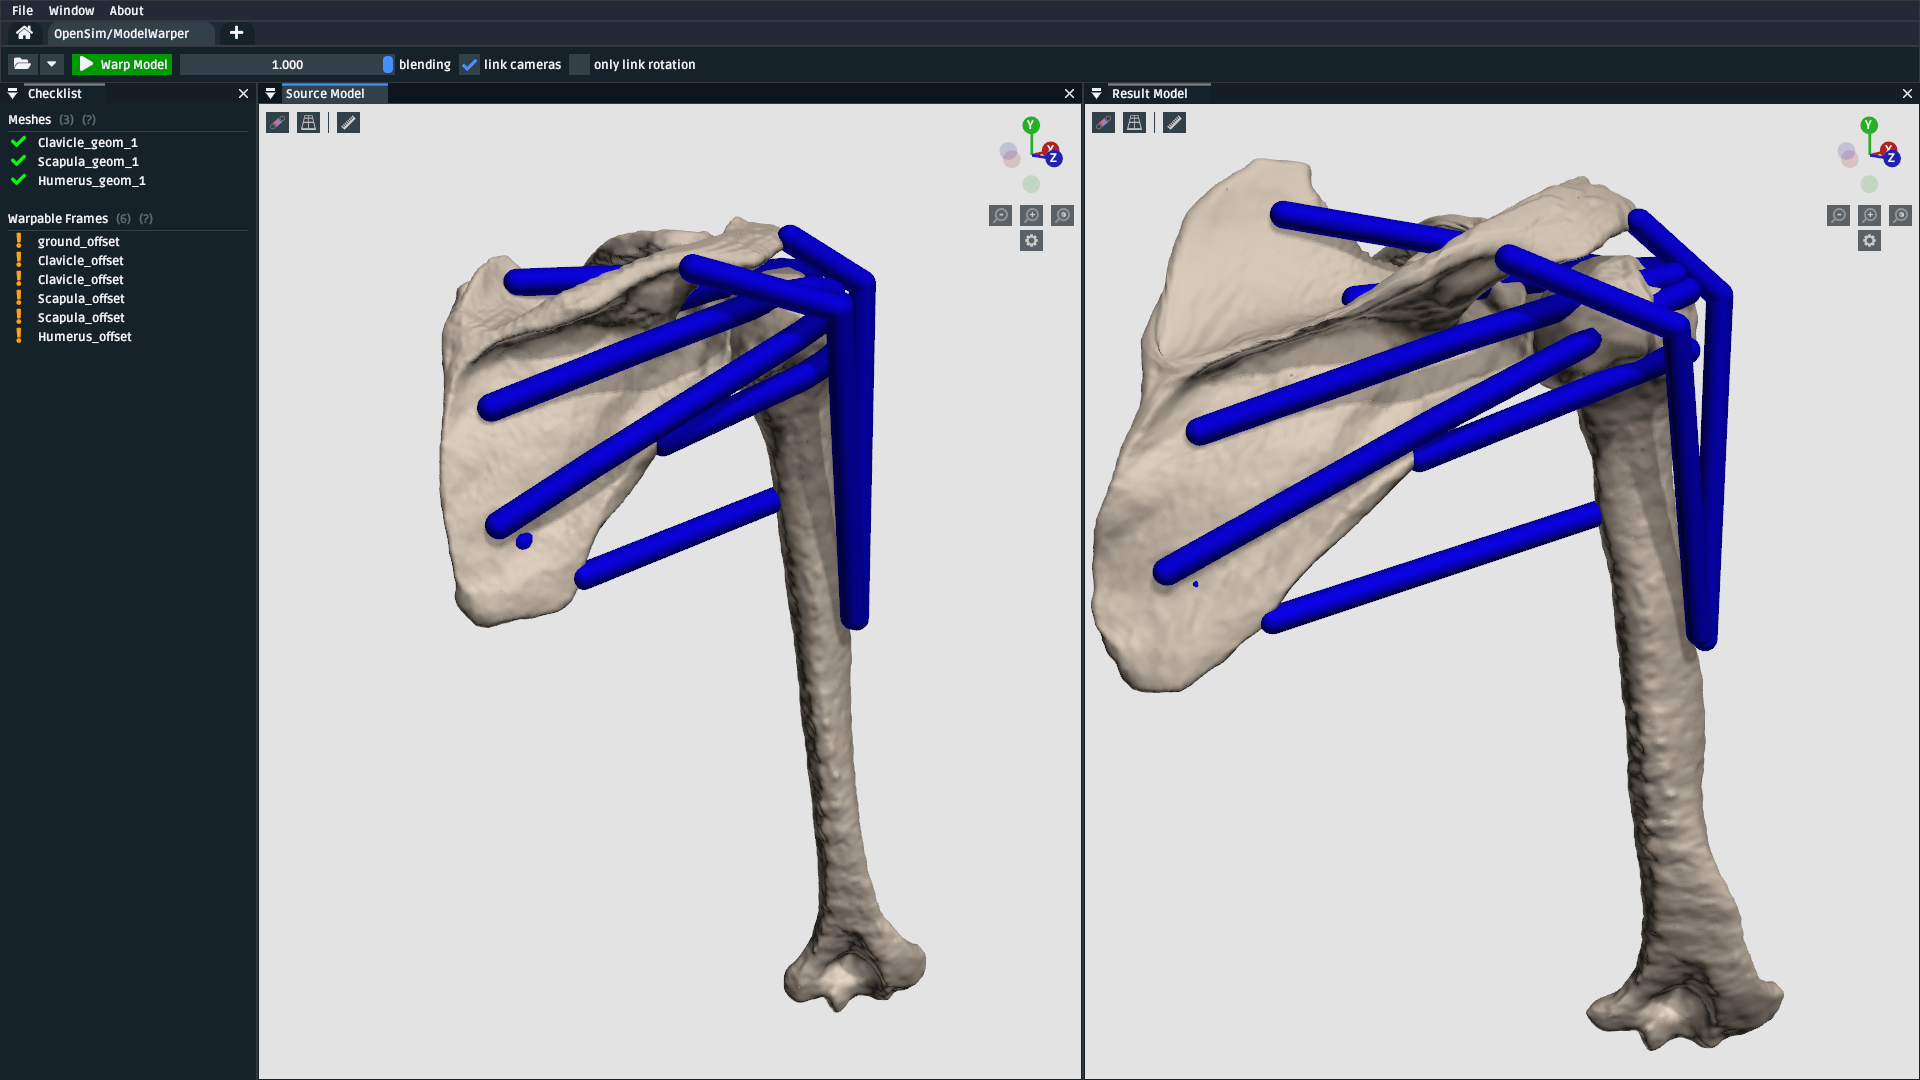
Fig. 6.1 A screenshot of the model warping UI, showing how it can be used to warp a source/reference/template OpenSim model (left) into a new model (right). In this case, the warping relationship is possible because there are corresponding landmarks available for all meshes in both the source and target (which were placed as described in Use the Mesh Warper). Those landmarks enable the non-uniform scaling shown above (e.g. the scapula has a different size and shape).#
6.1. Prerequisites#
You can diagnose and work with OpenSim models. This tutorial assumes that you’re able to diagnose the models that go into, and come out of, the model warping UI. If you don’t feel comfortable with working on OpenSim models, then we recommend going through earlier tutorials (e.g. Make a Pendulum, Make a Bouncing Block).
A basic understanding of the Thin-Plate Spline (TPS) technique. The model warper applies the TPS technique to multiple components in the source model. Therefore, it’s recommended that you have already gone through Use the Mesh Warper, which outlines pairing landmarks between two corresponding meshes as inputs for the TPS technique.
6.2. Topics Covered by this Tutorial#
A technical overview of how the model warper works
How to prepare an existing OpenSim source/template model for warping
A concrete walkthrough of warping a simple model
An explanation of how model warping behavior can be customized
Diagnosing and working around model warping issues
Limitations, references, future work
6.3. Model Warping: Technical Overview#
Warning
🪄 Work in progress 🪄: This explanation covers the internals of the
warping engine and, ultimately, the direction that we want to develop it.
However, the current (experimental) engine only supports warping
meshes, StationDefinedFrame s, and muscle PathPoint s.
Model warping is a general phrase OpenSim Creator uses to identify algorithms from its warping engine. The engine combines multiple scaling algorithms together in order to implement warpable models. At a high-level, the engine performs four steps:
It loads a source model (sometimes called a reference model or a template model).
Then it finds (or defaults) an associated warping configuration, which describes how it should warp the source model.
Then it validates the warping configuration against the source model by checking for potential ambiguities, missing input files (e.g.
.landmarks.csv), and inconsistent model references. It reports any validation warnings/errors through the UI, potentially halting the process until all errors are fixed.If steps 1-3 go well, it then generates a new (warped) model.
How the engine warps the model is very customizable. This is because source models can have a variety of scaling requirements. For example, some components might suit uniform scaling, while other components might suit non-uniform warping. The flexibility of model warping, combined with OpenSim’s inherent flexibility (many different components, wrapping, custom joints, etc.), makes model warping more complicated than mesh warping (as described in Use the Mesh Warper).
Fig. 6.2 An example directed graph that shows the dependencies used to create a warped model
(warped_model.osim ). Arrows indicate dependencies (they point from something
that depdends on something else). In this example, the engine loads the source
model (model.osim) and warping configuration (model.warpconfig.toml), which
declares that some components in the model (e.g. point) should be warped with a
TPS technique, which creates dependencies on corresponding .landmarks.csv
files. The model warping engine’s job is to provide a consistent framework for
designing warp behavior. The UI’s job is to present the underlying
complexity as readable checklists, warnings, and errors (Fig. 6.1).#
Note
Don’t Panic: This technical explanation is only here to give you a vague high-level idea of what’s happening under the hood, so that you can develop a general intuition about what’s actually going on, rather than it feeling like magic.
The practical usage of the tool (covered next) is designed to present the process as a linear sequence of steps with constant feedback, suggestions, debug messages, and so on.
6.4. Walkthroughs: How to Warp Models With the Model Warper#
Warning
🪄 Work in progress 🪄: This explanation assumes that you’re only warping the meshes, frames, and muscle path points of the model using the Thin-Plate Spline (TPS) technique. The requirements are likely to be relaxed once other (simpler) warping techniques are additionally supported.
Beware: this walkthrough section is going to be a little different from other tutorials’ walkthroughs.
In contrast to previous tutorials, which typically go through a linear sequence of steps that go from zero to something complicated, this section is instead going to go through separate step-by-step walkthroughs that each add something new to the model. This is to help familiarize you with the warping engine because, as your needs evolve, you may end up combining a lot of these steps into a single warpable model.
6.4.1. Opening the Model Warping UI#
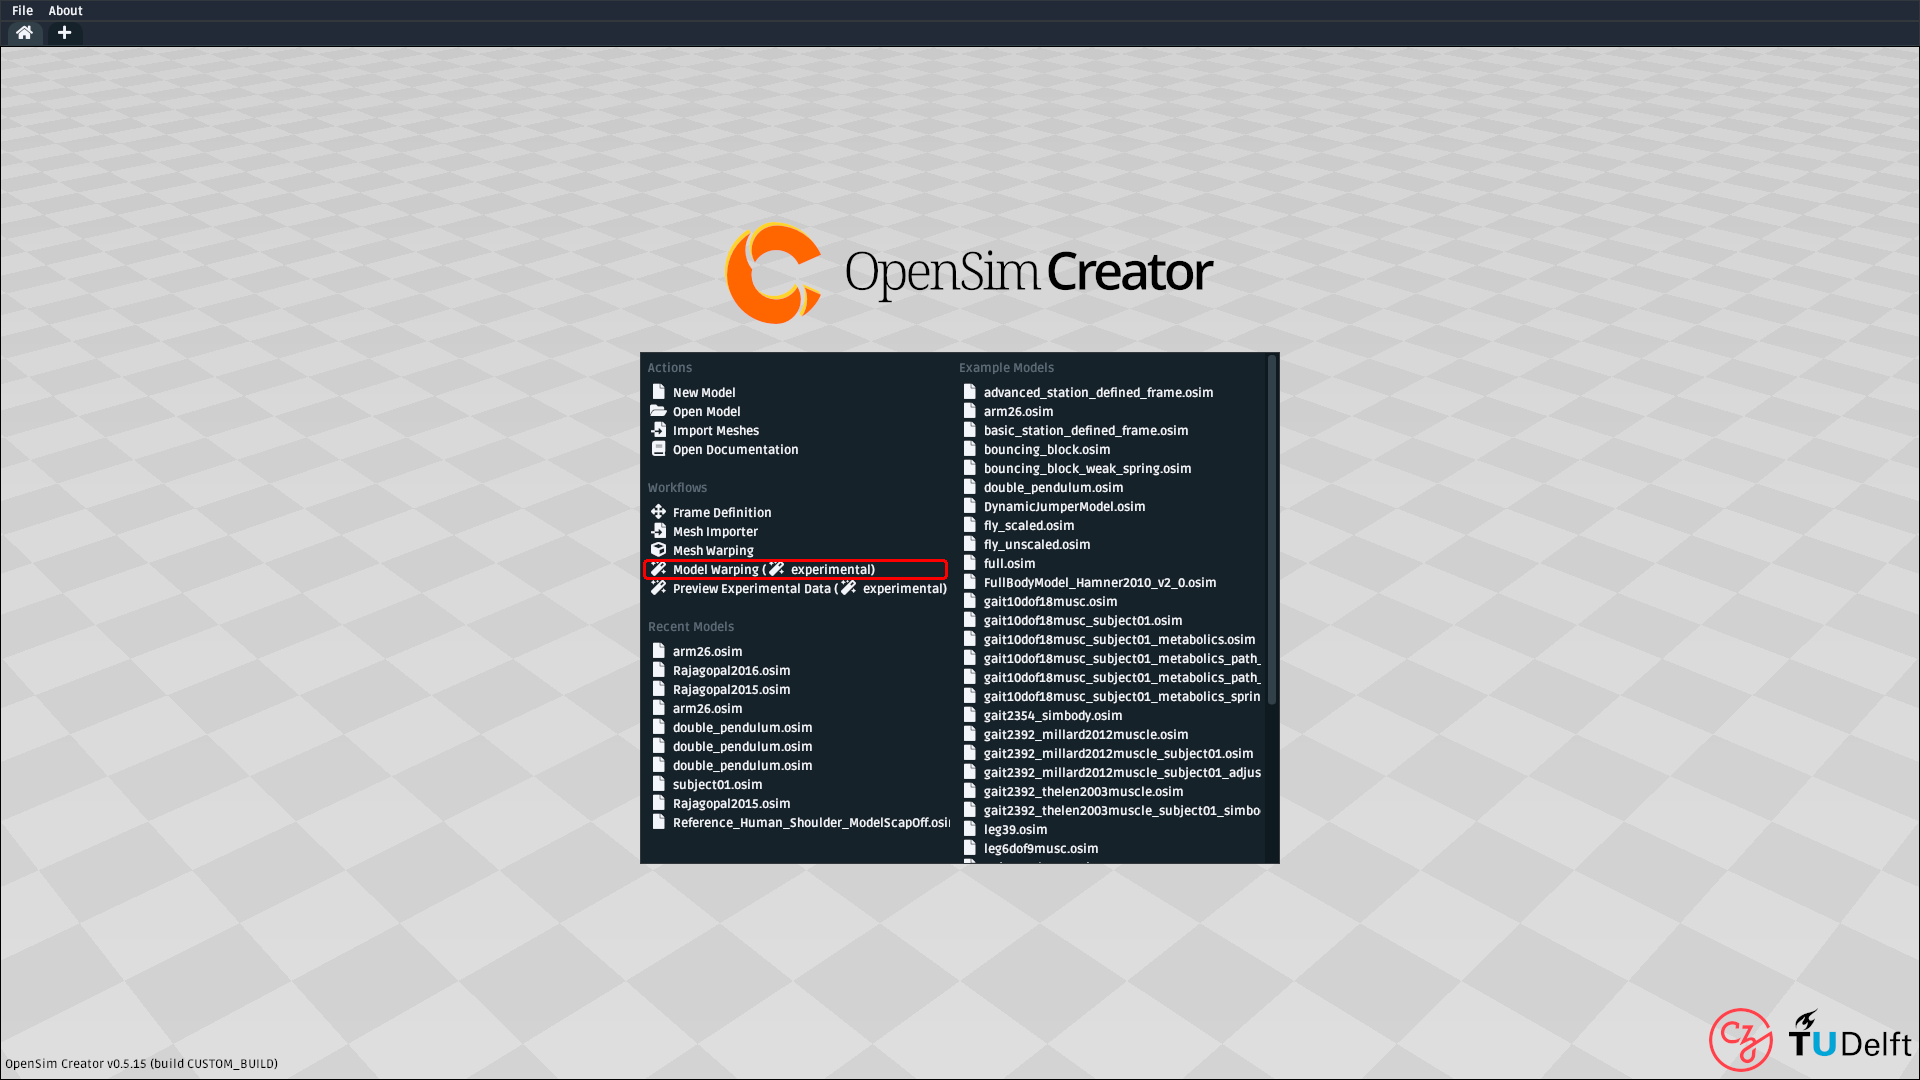
The model warping warping UI is an independent “workflow” UI that can be accessed from OpenSim Creator’s splash screen:

Fig. 6.3 A screenshot of OpenSim Creator’s main splash screen. The model warping UI can be opened from the main splash screen of OpenSim Creator (highlighted red).#
6.4.2. Model Warping UI Overview#
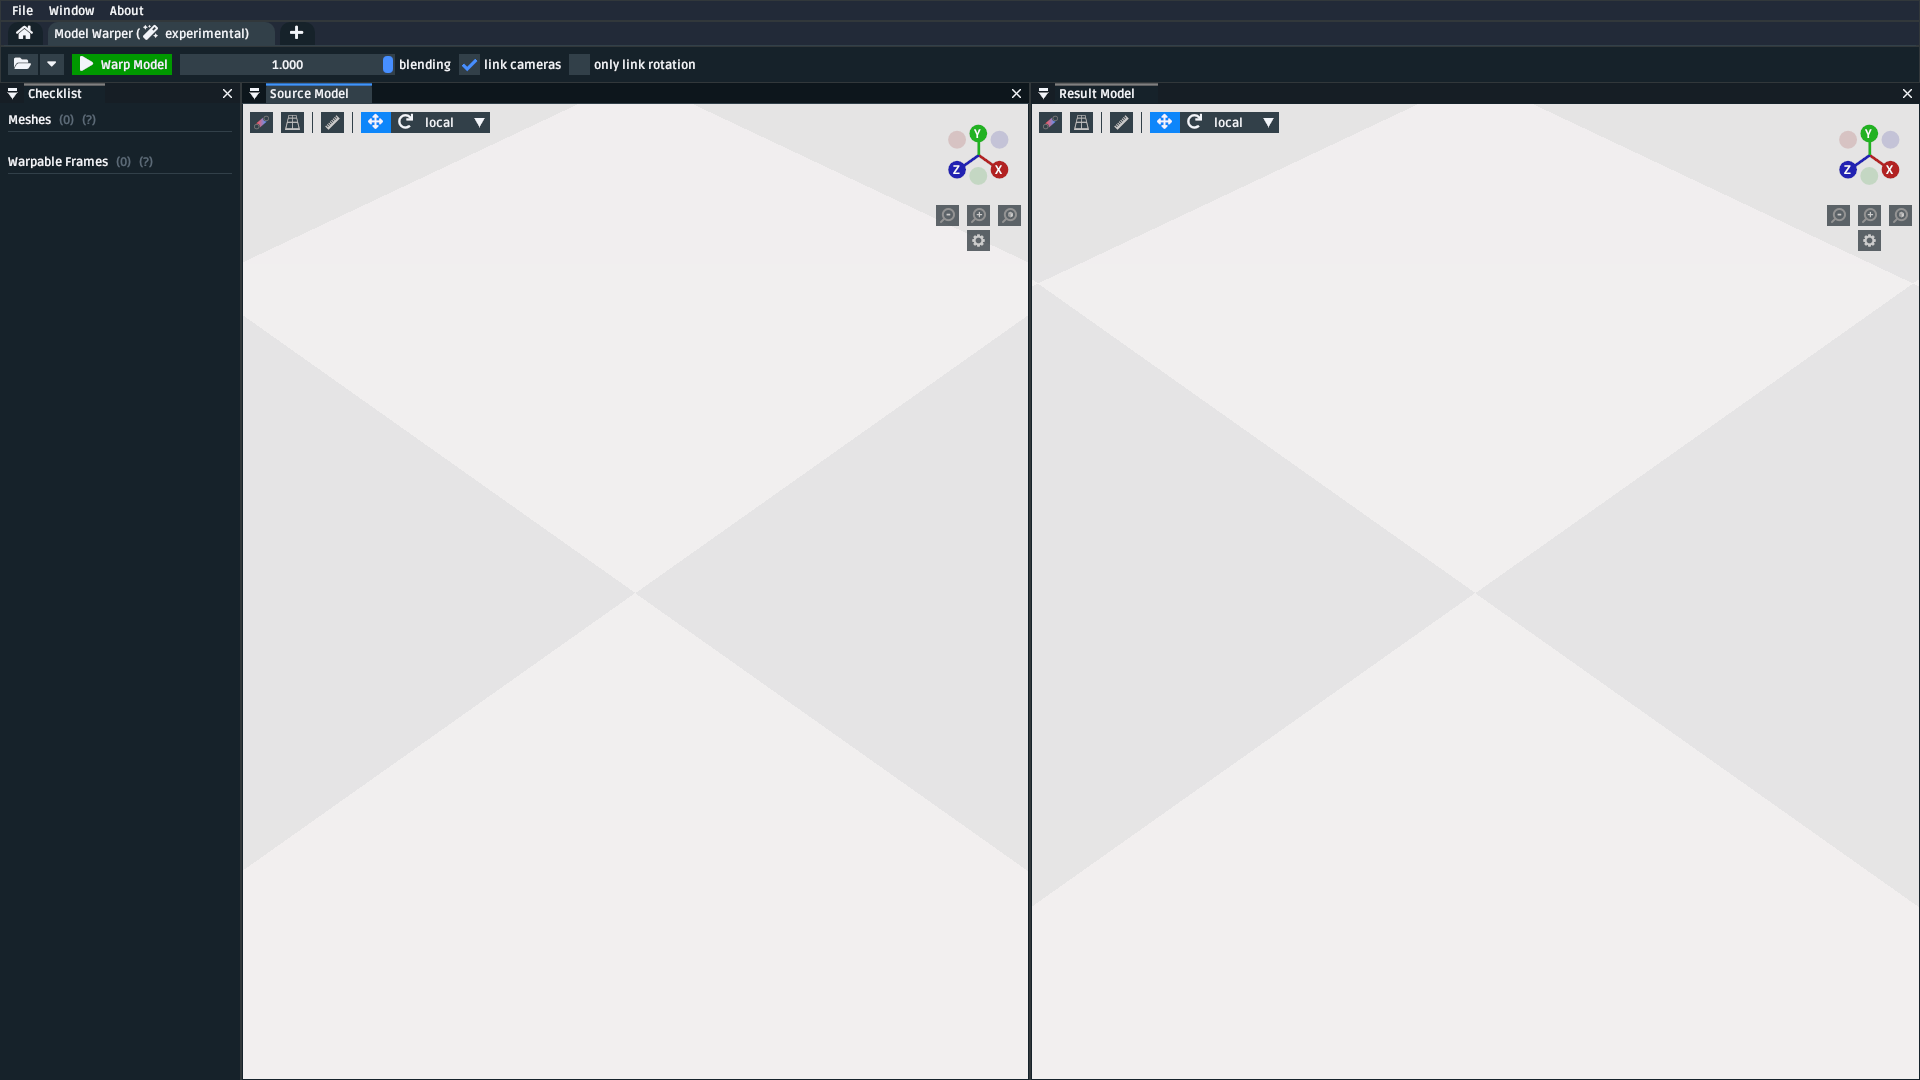
After opening the model warping UI, you will be presented with a UI containing
three panels (Checklist, Source Model, and Result Model) and a
toolbar:

Fig. 6.4 A screenshot of the model warping UI after opening it. It initially shows a
model warp for a blank model (i.e. no bodies, joints, or meshes). Left: the
Checklist panel. Middle: The Source Model panel. Right: the
Result Model panel. Third Row from the Top: the model-warping-specific
toolbar.#
Here is the role of each element in the UI:
- Checklist:
Lists each component that the model warper is attempting to warp. Contains useful feedback about what’s happening (which algorithms are being used, which input files are being used, etc.) and will list any validation errors related to that component ( e.g. missing input files, ambiguities).
- Source Model:
The “source” OpenSim model (
.osim) that the model warper is trying to warp. This model is combined with the warping configuration, and input data/parameters, to produce the result model.- Result Model:
The “result” OpenSim model that the model warper has managed to produce - assuming there are no warping errors. This is the model that’s ultimately exported when you click
Warp Modelin the UI.- Toolbar:
Shows workflow-specific actions. Notably, you can use the buttons in the toolbar to load the source model, warp the source model (i.e. export the result model to a new
.osimeditor tab), and blend between the source/result models.
When the model warping UI is initially loaded, it shows a blank model. This is
is trivially warpable (there’s nothing to warp!), so you can immediately complete
the process by clicking Warp Model. However, warping nothing isn’t interesting.
We’ll use the next few walkthroughs to make it more interesting - at the cost of
being more complicated 😉.
6.4.3. Walkthrough: Warping a One-Mesh Model#
The next step up in complexity from the trivial case (an empty model) is a model containing a mesh that’s directly connected to ground (origin). This roughly mirrors what’s seen when using the mesh warper (see Use the Mesh Warper).
To do this, we’re going to first create the model and try to load it into the model warping UI. We’ll then deal with any issues that the model warping UI spots, such as missing landmarks, followed by generating a warped version of the model.
Create a zero-body, one-mesh model:
Create the model by opening a new model from OpenSim Creator’s splash screen.
Attach the mesh to
groundby right-clicking thegroundcomponent,Add,Geometry. UseTODOthis sphere mesh.Save the model to a new directory (e.g.
model_dir)
Load the model into the model warper and evaluate what’s missing:
Open the model warper as described in Opening the Model Warping UI
Open the model in the model warper using the open button/shortcut
The
Checklistpanel should any warping steps, validation issues, etc. - specifically, it should show that the sphere mesh isn’t warpable because the engine cannot find landmarks for it.
Create source and destination landmarks for the mesh:
TODOTODO
Reload the model in the model warper and generate the warped model:
TODO
6.4.4. Walkthrough: Warping a One-Mesh, One-Body Model#
Warning
This section hasn’t been written yet: model warping is very 🪄 experimental 🪄!
TODO: create/offer a model that is the same as above, but with the meshes
attached to a body. The reason this case is more complex is because adding a body
also requires adding a joint. Joints usually use PhysicalOffsetFrame s to
offset the joint center, and warping an offset + orientation requires modellers
to make decisions (Only warp the offset? Only warp the orientation? Combine
warping data from all meshes attached to both the parent and child body of
the joint? etc.).
TODO: this is also the place where StationDefinedFrame should be
presented, because it’s trivially warp-able (just warp the stations and the
frame will automatically warp).
6.4.5. Walkthrough: Warping a One-Mesh, One-Body, One-Muscle Model#
Warning
We are still writing this section. Model warping is very 🪄 experimental 🪄
TODO: create/offer a model that’s the same as above, but also contains a muscle. The
warping engine currently just figures out which body the muscle is attached to and
then warps the muscle point.
6.5. How to Customize Model Warping behavior#
Warning
This section hasn’t been written yet: model warping is very 🪄 experimental 🪄!
TODO : Explain how the user can use the .warpconfig.toml file to customize how the
model warper warps models.
6.6. Diagnosing Warping Issues#
Warning
This section hasn’t been written yet: model warping is very 🪄 experimental 🪄!
TODO : explanation of any known issues, recommendations for working around them
etc.
6.7. Outlook/Planned Future Changes#
.warpconfig.tomlto be changed to a new specification that enables much more nuanced warp customization. E.g. a single place where designers can designate a combination of TPS warping, statistical shape modelling, traditional scaling, etc. in one specification for warping a complete model.Non-spatial warping/scaling. E.g. muscle parameter scaling.